Note:
- Need to know how to obtain your newsletter subscription list from MOCE?
Click here. - You must have a CSV file contained with email information in order to utilize this feature.
- A sample list that provides the required fields can be downloaded HERE.
- When customers updates their preference they will have to ability to add/remove themselves from any email list available this also means they will be able to see all the email list names.
- If an email list has an address from another list in it and both lists are used the customer will get two emails.
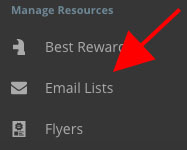
- Once you are logged into your oDash account, click on the "Email List" module in the left menu column.
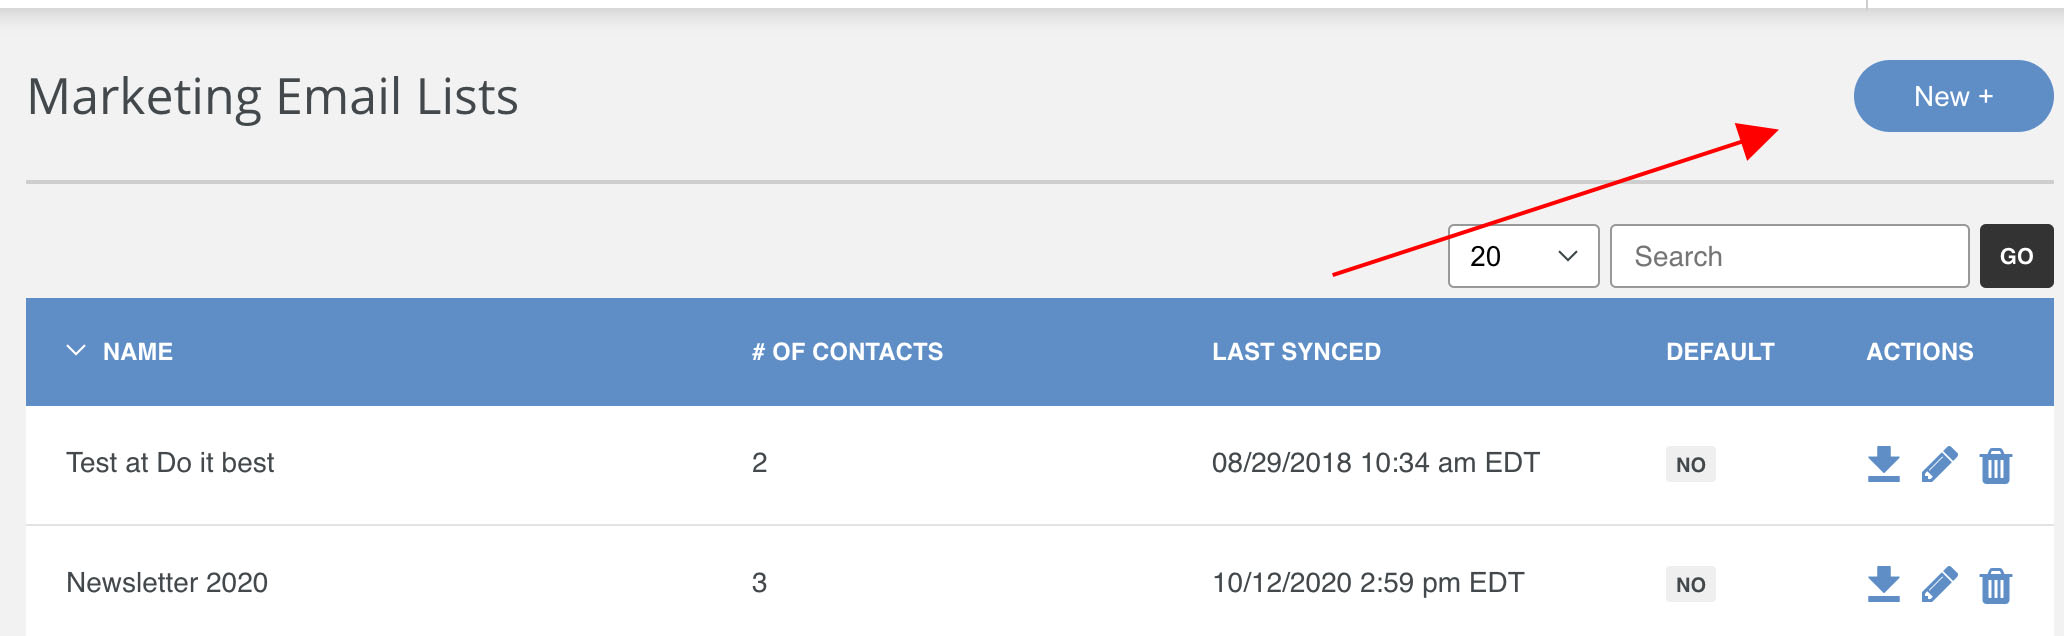
- Click the "New" button at the top right hand corner of the page to begin the upload process.
- The "New Email List" page appears. Now you can enter the name of the list you are about to upload. Important Note: the file must be in a ".csv" format. You can save Excel spreadsheets as ".csv" formats by performing a "Save As" function when saving.
NOTE: A sample list that provides the required fields can be downloaded HERE.
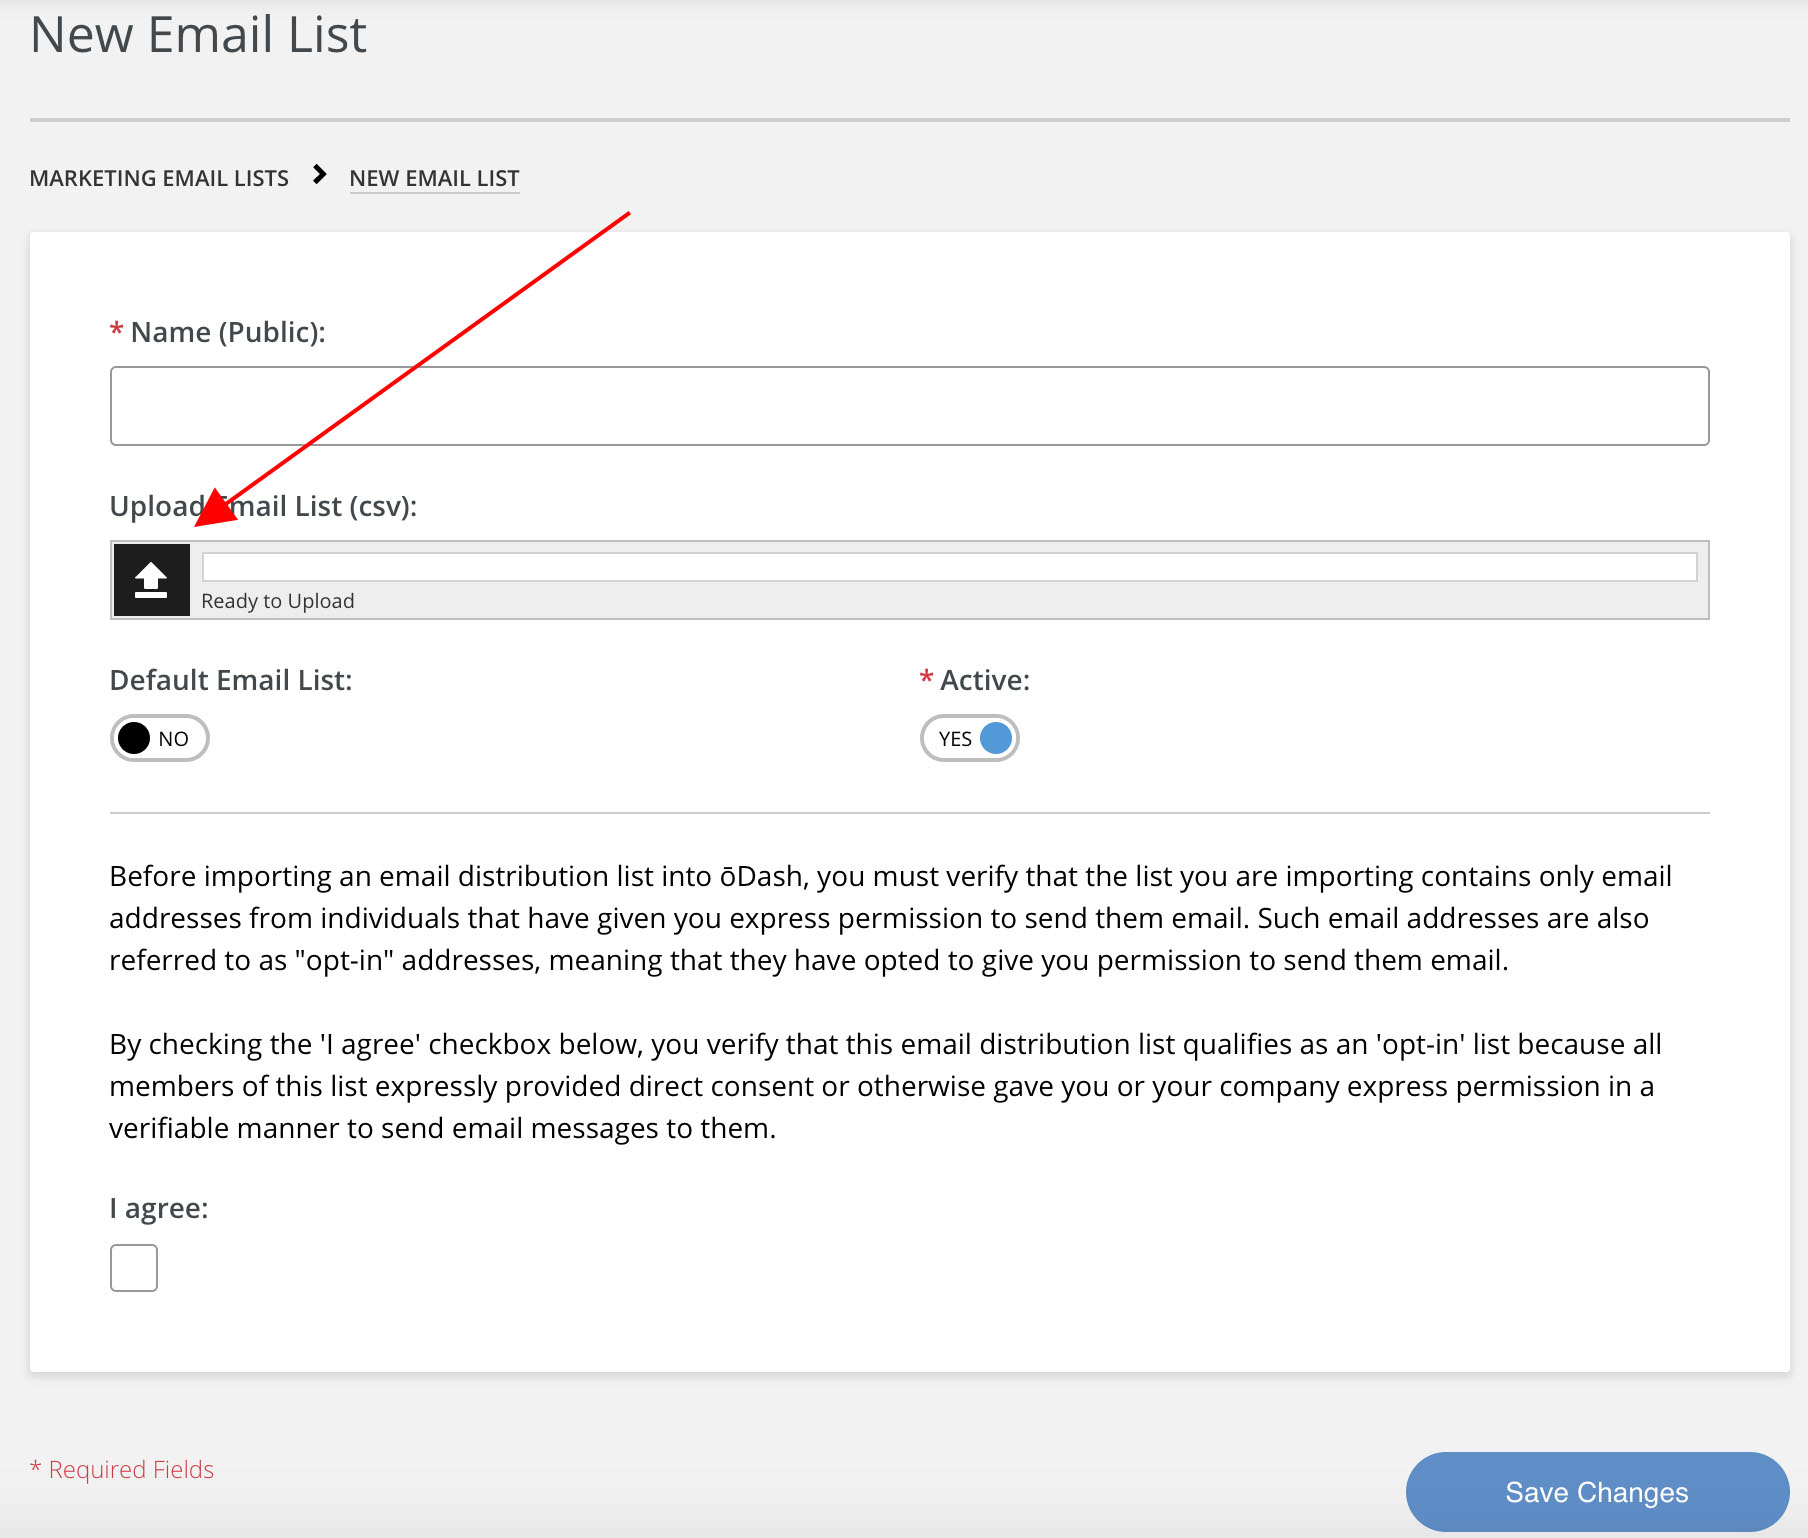
- Once you have uploaded your file you will notice a green bar indicating success. At this point you have a few options:
- "Default Email List" moving this option to "yes" will set your list as the list that will be used if a specific email list is not selected.
- "Active" is the status of your list to be used in any email campaign. This is required, and should be set to "Yes" if you intend on using the list in a current or future campaign.
- "I agree" check box ensures that you are complying with the requirements listed within the window. You must agree to the terms before proceeding.
Note: The Newsletter list that is generated from your MOCE website and download from MOCE Admin meets these requirements.
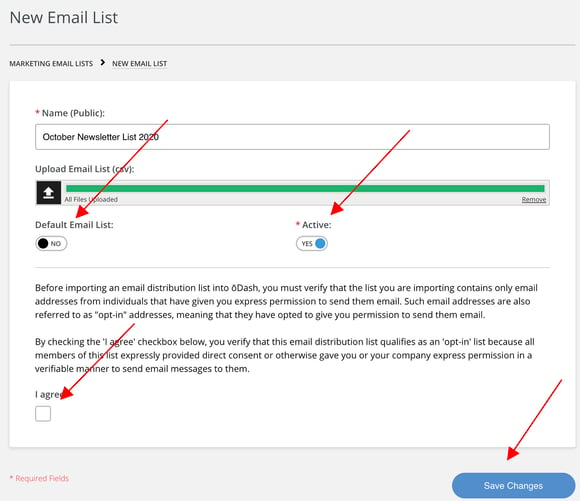
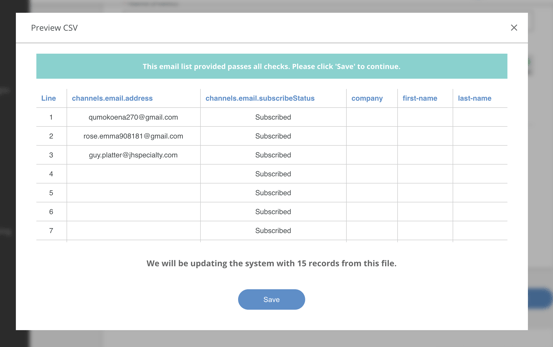
- After you have completed the above options, you may click the "Save Changes" button. A "Preview CSV" prompt window will appear as a last check to ensure that your information is in order. When possible it is best practice to have as much information on the customer/consumer as possible. You may click "Save" when you are satisfied with the information provided. You have the option to click the "X" at the top right hand corner of the window in case you wish to make changes to your list before uploading.
- You will see a window that states you have successfully uploaded the file. Click "ok."
- You will notice that when you return to the "Marketing Email Lists" page, your new uploaded list will have the processing circle where a number should be under the "# OF CONTACTS" column. oDash will take several minutes to process your new list.

- You have successfully uploaded an email list for your marketing campaigns. To utilize that list, you can go here to learn how to use this list in an email campaign.
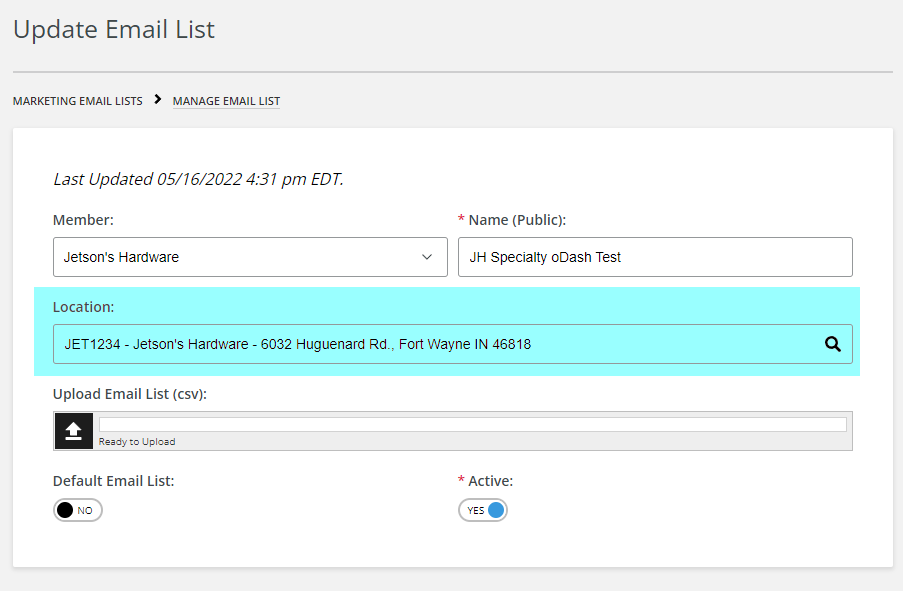
Make sure that the Email List has a location attached to it. If you don't, your address will show up incorrectly on emails. See the highlighted in blue below.
To get to this screen you can press the pencil (edit) button in the actions.